
Does anyone remember the uglydolls? When my first child was in the womb, I taught a high school art class and we didn't have many resources for the class. It was supposed to be a sculpture class and kiln was broken. I had to improvise. I drew on all the different art I had learned over the years and the skills I had acquired and I looked at what was trendy.
There was a popular doll out at the time called the Ugly Doll and it simply was a stuffed pillow looking doll made of felt that was kind of monstrous and yet kind of cute. Our class learned to sew by making Ugly Dolls.
Fast forward and on Etsy I had found a woman who would take drawings children would make and create a doll from it.
My daughter loved the idea, after years of not caring, of a doll that was made for her to play with when she was born. I had made two of them out of discarded fabric the other kids didn't want!
Well, recently she had been nagging me about making her another one and I just didn't have the time to. But it was important to her so I gave her a piece of paper and an outline and said 'draw your doll on here' and I'll try to make the doll from your drawing.
I didn't really have the right materials, didn't want to schlep to Joann fabrics to buy stuff, and then one day opened the closet to get something I needed and found a Cardimom (which if you're here, you know is my convertible cardigan to poncho sweater that is great for travel and among other things, nursing in public) that I had sacrificed to try a different neckline or something. It was ruined and I had wanted to throw it away but couldn't bring myself to doing so. So, then I thought - OH, I can use this to make the doll!
If you have an old shirt, leftover material, or an sweater you want to discard, you can use the fabric to create a stuffed animal or doll for your child. It is pretty simple.
Here's the photo she drew:

Materials needed:
- fabric or old sweater, could even use a baby sweater or a onesie
- scissors
- needle, thread
- sewing machine or hands
- fabric markers or fabric paint
- pillow stuffing or some alternative stuffing such as buckwheat or lavender
- embellishments such as buttons or ribbons
Here is what I did to make the doll:
- used the upper arm area as the fabric source, cut it out
- drew the outline of the doll onto it with pencil (or freehanded it actually - not recommended!)
- cut the shape out with scissors
- put exterior faces of fabric on the inside facing each other and matching up
- stitched with a small/short stitch using a sewing machine around the shape of the doll, leaving a gap at the crotch of the doll and the top of the head
- inverted the doll inside out
- used pillow stuffing to stuff all the nooks and crannies of the doll
- hand sewed the two openings closed
- used fabric paint to draw the drawing onto the doll (recommend you practice on paper or the extra fabric leftover first - check in with the child to make sure they are happy with each step)
- embellished the doll with buttons or other notions
- wrote names, date, and ages on the back of the dolls
Of course if you have two children, you can not make one doll for one child. It simply is not fair. I also had my youngest one draw a doll but it was quite unintelligible so I had to use creative license. The result? Their favorite doll for a week or two!
This might be a fun project to do during winter break!
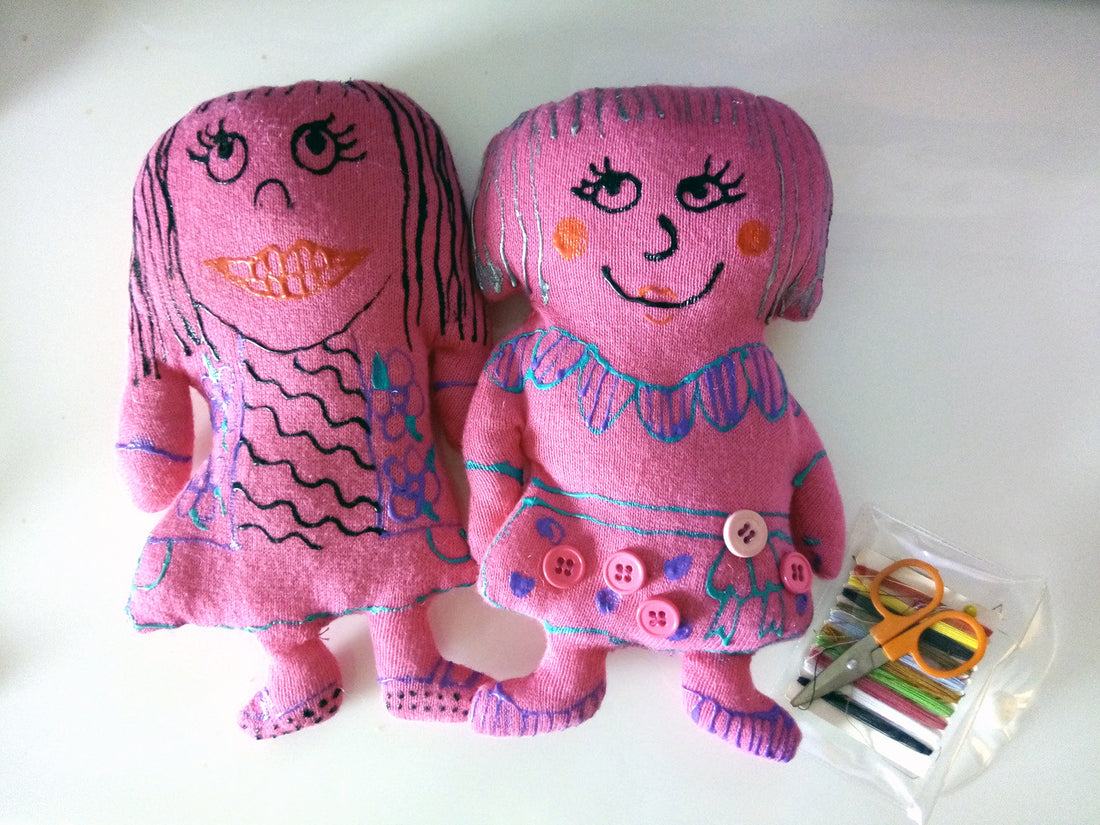
Here is the final result! What do you think? Let me know in the comments!
